Docs › RotoSpider manual › Choose the right shape for a product
Build a shape that changes as it goes up
Describes RotoSpider Desktop 0.8.13 · checked 2026-09-13 D5
Some molds are not one outline at every height: a tapered bin that is wider at the top, a kayak hull that is widest above its deck line, a cone-bottom hopper, a domed tank, a road barrier with a broad foot and a narrow top. The Levels Shape describes these as a stack of outlines, one at each height, with every corner of every outline free to drag. RotoSpider joins the levels into one solid and fits that.
How a Levels Shape is built
A level is an outline at a height. Level 0 is on the plate, at height zero; each level above has its own height, and the heights increase going up. Every level has the same number of corners, and corner 1 of one level is tied to corner 1 of the next, corner 2 to corner 2, and so on: the ties are the edges of the solid running up its sides. That rule is what lets the app make one solid from the stack without guessing which corner joins which. A shape can have from two to eight levels.
Opening the editor
On the Mold Data tab, select the row, press Change Shape and pick Levels Shape. The editor opens on a two-level shape made from the mold's own size: the top level is the row's footprint at the row's height, the bottom level a copy drawn in by eight per cent on each side, so the default is already a gentle taper you can pull into the real one.
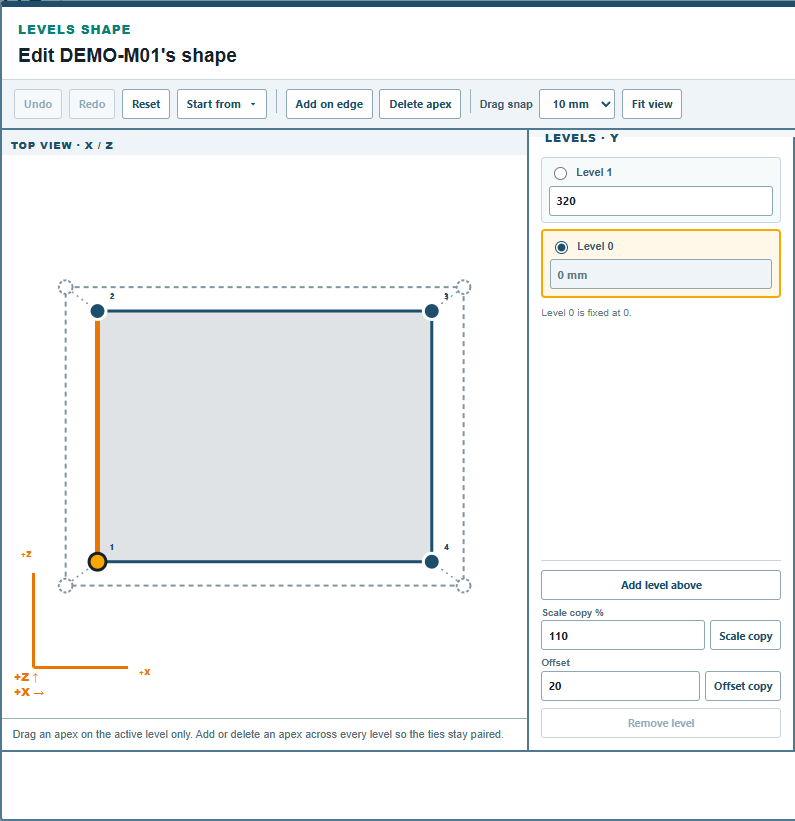
The top view shows all the levels at once, the active one drawn strong; the 3D view beside it shows the solid. On the right, LEVELS · Y lists the levels from the top down with a round button to choose the active level and each level's height field, Level 1 height and so on; Level 0 is fixed at 0.
Editing
- Choose the level, then drag its corners in the top view or type them in the
Apex 1 XandApex 1 Zfields of the table below. Only the active level's corners move. - Add a level with
Add level above: a copy of the active level is placed above it, 100 mm higher when it goes on top of the stack, halfway to the next level when it goes between two; then type its real height.Scale copyadds the copy scaled by the percentage inScale copy %(110 to start with), which is how a tapered bin is made in one step;Offset copyadds it grown or shrunk by theOffsetdistance on every side, keeping the corner count.Remove leveldeletes the active level; a shape keeps at least two. - Add or delete a corner with
Add on edgeandDelete apex. Because the levels are tied corner to corner, the corner is added to, or removed from, every level at once. Start fromreplaces every level's outline with the same preset (a rectangle, a regular polygon, an ellipse, a stadium, a rounded rectangle), keeping the heights; the taper is gone at that point, so scale or offset the upper levels afterwards to make a dome, a cone or a bin.Drag snap,Undo,Redo,ResetandFit viewwork as in the footprint editor.
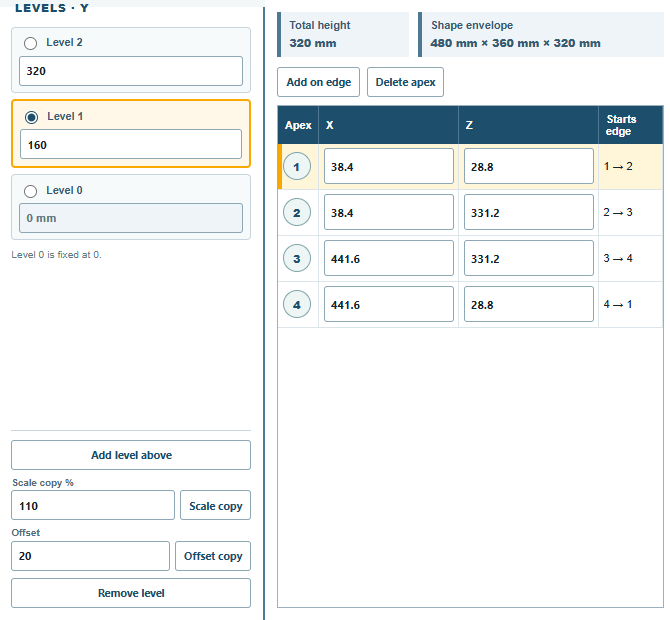
Total height and Shape envelope under the table show the height of the top level and the outside size the row will get.
What the editor refuses
Each level's outline must be a simple closed shape, as for a drawn footprint, and it must run the same way round as level 0; the editor says "Level 2 turns the other way" when a drag has flipped one. The ties between two levels must not cross each other in the top view, which happens when the corners of one level are dragged past each other; the message names the two ties and the two levels. While the shape is broken the 3D view goes blank and Build & Use is disabled.
After building
Build & Use makes the solid and puts it on the row as Levels Shape, with the envelope as its footprint and height. The trial's DEMO-M23 is a tapered bin built this way: 480 by 560 mm on the plate, 580 by 730 mm at 1070 mm up. The layout fits the exact stacked shape against its neighbours and the arm's envelope; the page on the space a shaped mold needs says how.
A wall draft of a degree or two makes no difference to a layout; use the Levels Shape where the top and the bottom differ by a hand's width or more, or where the mold steps.
Comments and questions
The app's rules are our reading of the physics; where your plant knows better, the app changes.