Docs › RotoSpider manual › Start here
Make your first layout
Describes RotoSpider Desktop 0.8.12 · checked 2026-09-12 D5
Five minutes with the trial data: pick a machine, say how many parts you need, and read the layout RotoSpider gives you. Every later chapter starts from this page.
1. Open the app and look around
Start RotoSpider. Across the top are the file buttons New, Close, Save and Open, then Undo, Redo, Reset layout and Solve anew, and a row of tabs: Settings, Mold Data, Spider / Arm Data and the layout itself, Layout 1.

The layout tab is where you spend your time. It has three parts and a strip along the bottom:
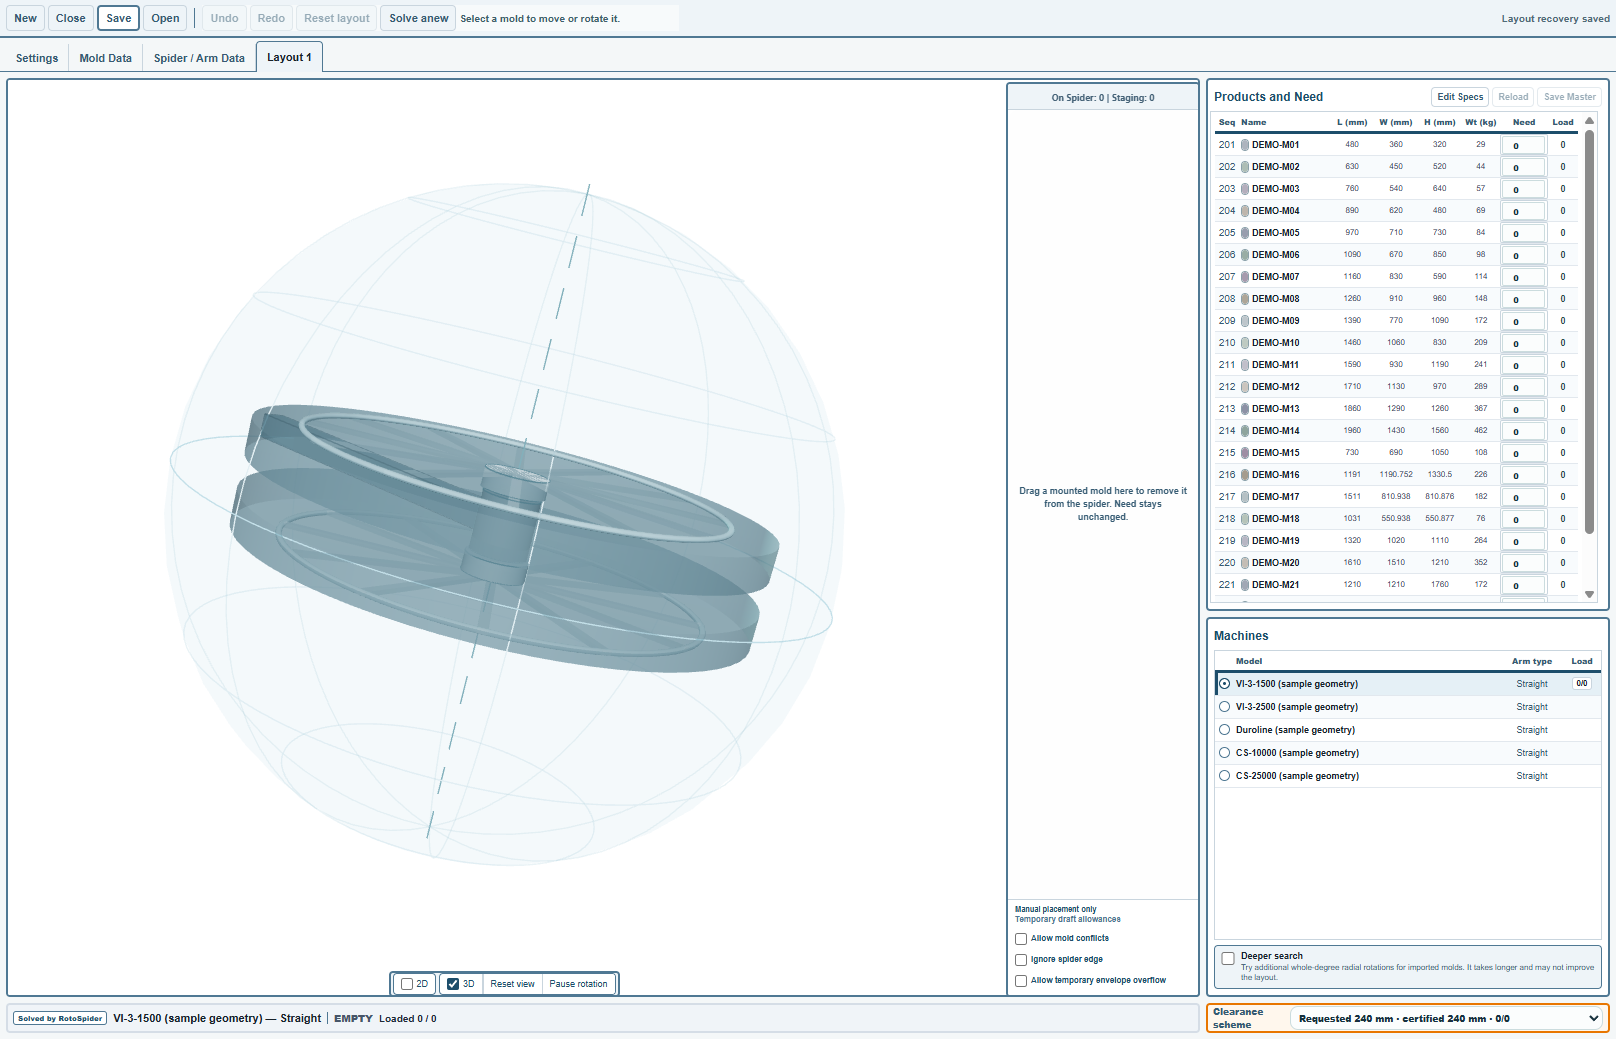
- The scene on the left shows the arm, its spiders and the molds in 3D, turning slowly. Under it,
Pause rotationstops the turning,Reset viewputs the camera back,2Dadds the plan views of the upper and lower spider beside the scene, and3Dhides or shows the scene itself. - The staging area in the middle is where molds wait when they are not on the spider. Its header counts them:
On Spider: 0 | Staging: 0. - The input rail on the right holds
Products and Need, the table of your molds, andMachines, the list of your arms. - The status strip along the bottom says which machine is loaded, whether the layout is
EMPTY,PARTIALorFEASIBLE, and how many molds are loaded of how many requested.
2. Pick a machine
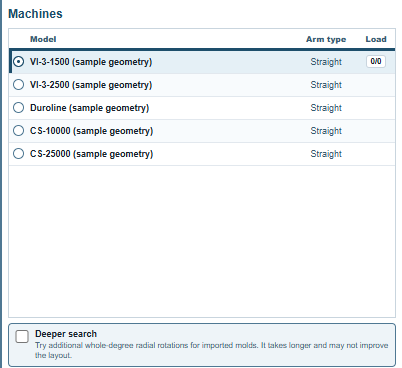
In Machines, each row is one arm from your workbook with its model, its arm type and, for the selected one, its load. Choose one by its round button. The five trial machines are all straight arms, which carry an upper and a lower spider; an offset or L arm, which carries one spider, shows Offset/L here. The scene changes to the chosen arm at once.
3. Say what you need
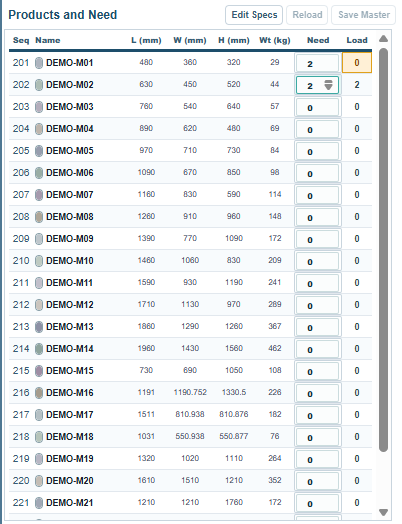
In Products and Need, each row is one mold from the workbook with its length, width, height and weight. Type a number from 0 to 99 in the Need column. Try 2 for DEMO-M01 and 2 for DEMO-M02 on the first machine, VI-3-1500. The layout is computed as soon as a value changes; there is no button to press. The Load column then shows how many copies of each mold the layout placed.
4. Read the result
Look at the status strip first. On the small VI-3-1500 the two requests do not both fit:

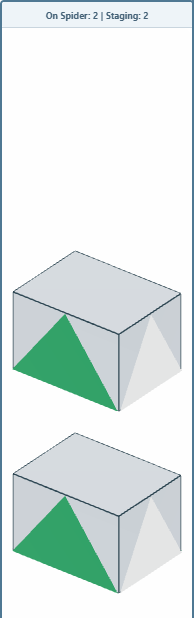
PARTIAL with Loaded 2 / 4 means two of the four requested molds are on the spiders and two are not. The sentence after it says why, here that the remaining space on the two spiders is not enough. The molds that did not fit wait in the staging area, drawn to scale:
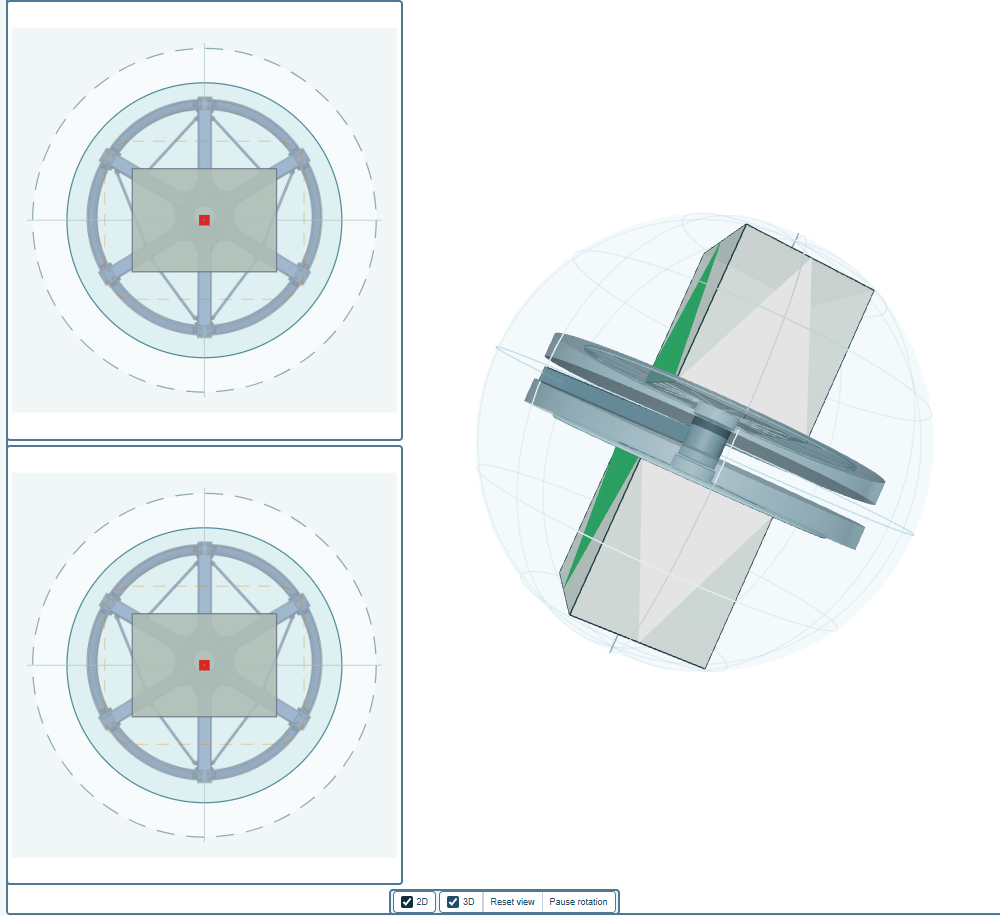
Turn the scene with the mouse to see where each mold sits. Tick 2D to read the plan of each spider from above, with the clearance around each mold drawn as a dashed box:
5. Try another machine
Choose VI-3-2500 in Machines. The same request is laid out again on the larger arm, and the strip changes:

FEASIBLE with Loaded 4 / 4 means every requested mold is on a spider with the clearance kept. This is how you compare machines for a job: the request stays, the arm changes, and the strip tells you which arm takes it.
6. Keep it
Save writes the layout to a file you name; Open brings it back later; New starts a fresh layout on the same workbook, and Close closes the current one. A dot on the Layout 1 tab means it has changed since it was saved.
What to read next
- Install the desktop trial if you have not yet.
- The chapter on setting up your factory's data, to replace the trial machines and molds with your own.