Docs › RotoScheduler manual › Start here
A first look at a plan
Describes RotoScheduler 0.2.1 · checked 2026-09-14 D5
Ten minutes with the sample factory: the plan line, the three time spans, the phases of one machine, a mold run and a single cycle. Every later page starts from here.
1. The plan line and the work still waiting
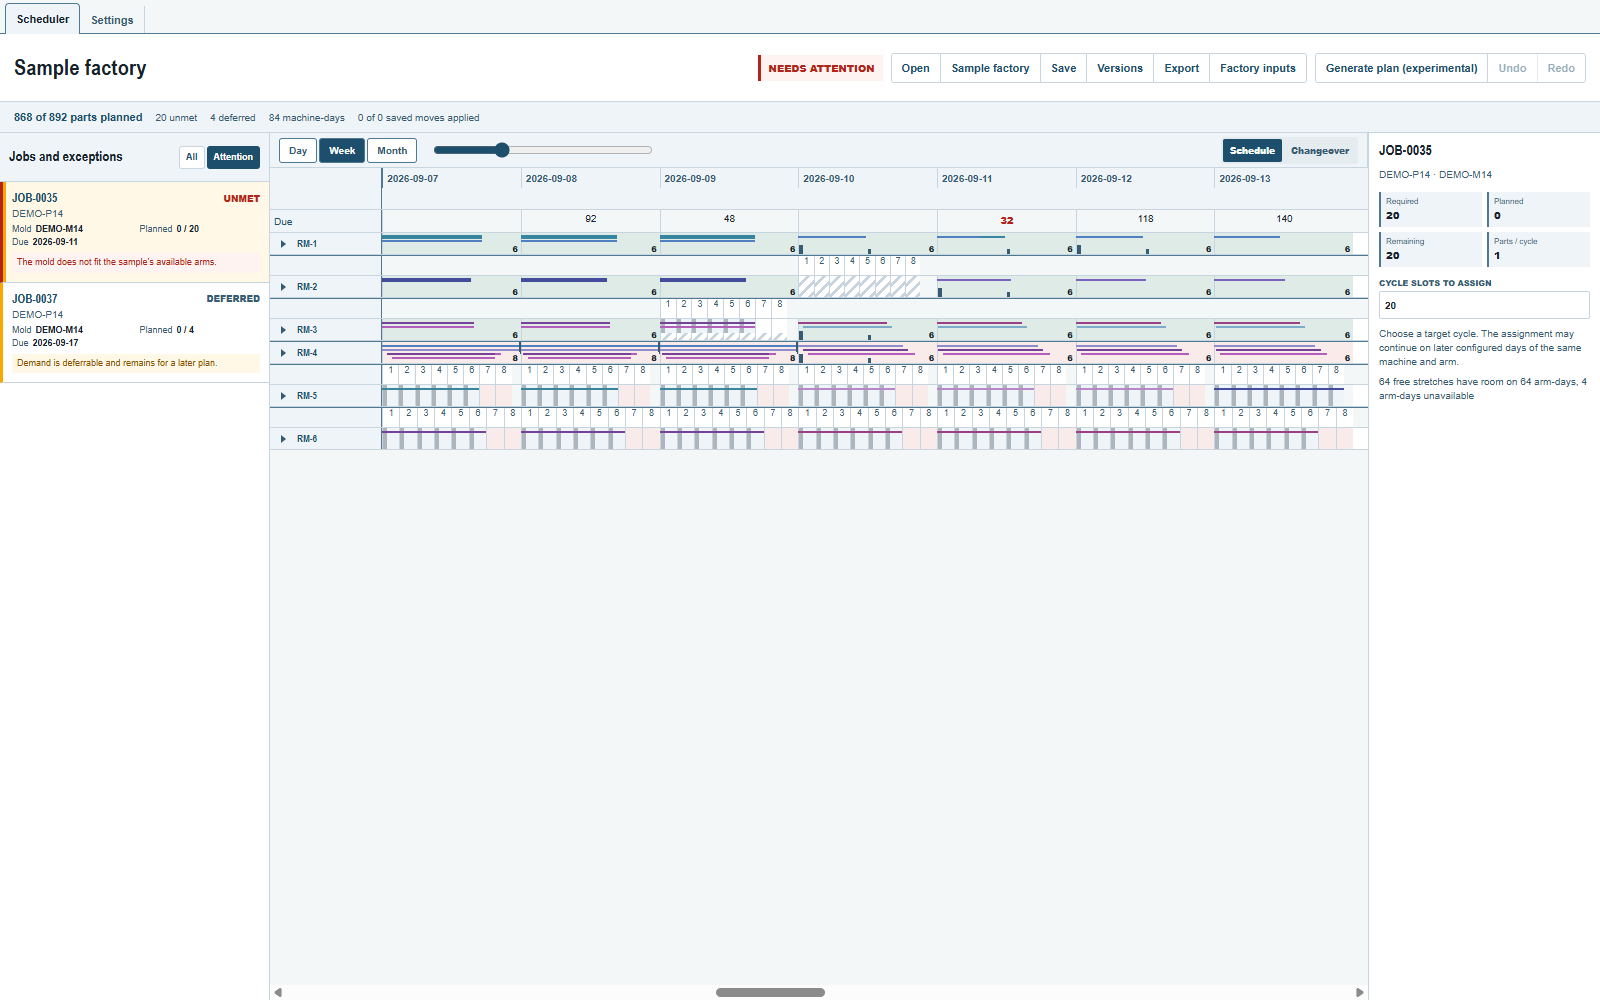
Above the board, the sample says 868 of 892 parts planned. These are planned parts, not completed production. The same line shows 20 unmet, 4 deferred and 84 machine-days. A machine-day is one machine on one date; the count includes the sample's closed day.
Click Attention beside Jobs and exceptions. Two sample jobs remain: JOB-0035, with 20 parts unmet, and JOB-0037, with 4 parts deferred. Click JOB-0035 to read its required, planned and remaining quantities on the right. The reason under its job card says the mold does not fit the sample's available arms. Click All to return to the full list, and press Esc to clear the selection.
2. Week, Day and Month
Click the arrow beside RM-4 to show arms A, B and C. Try the three shortcuts above the board:
| Control | What you see |
|---|---|
Week |
A week of working dates, for seeing which molds stay on each arm. |
Day |
One date's working window, with individual cycles where there is room to draw them. |
Month |
A calendar month. Dates outside the sample's two-week plan are blank. |
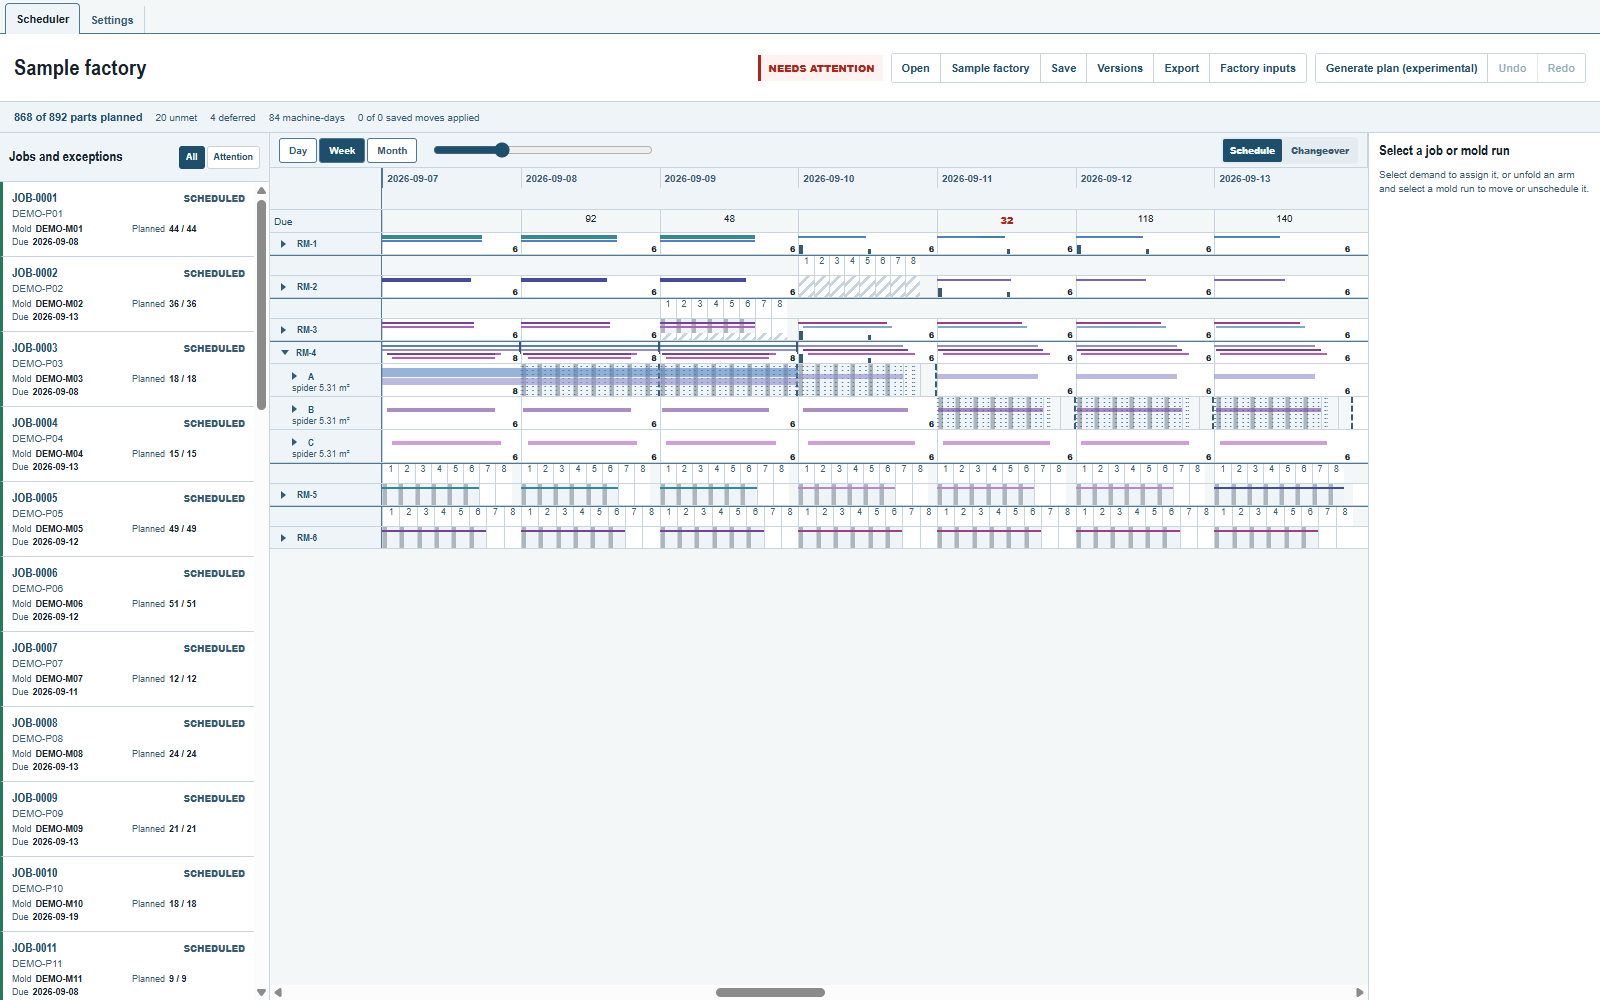
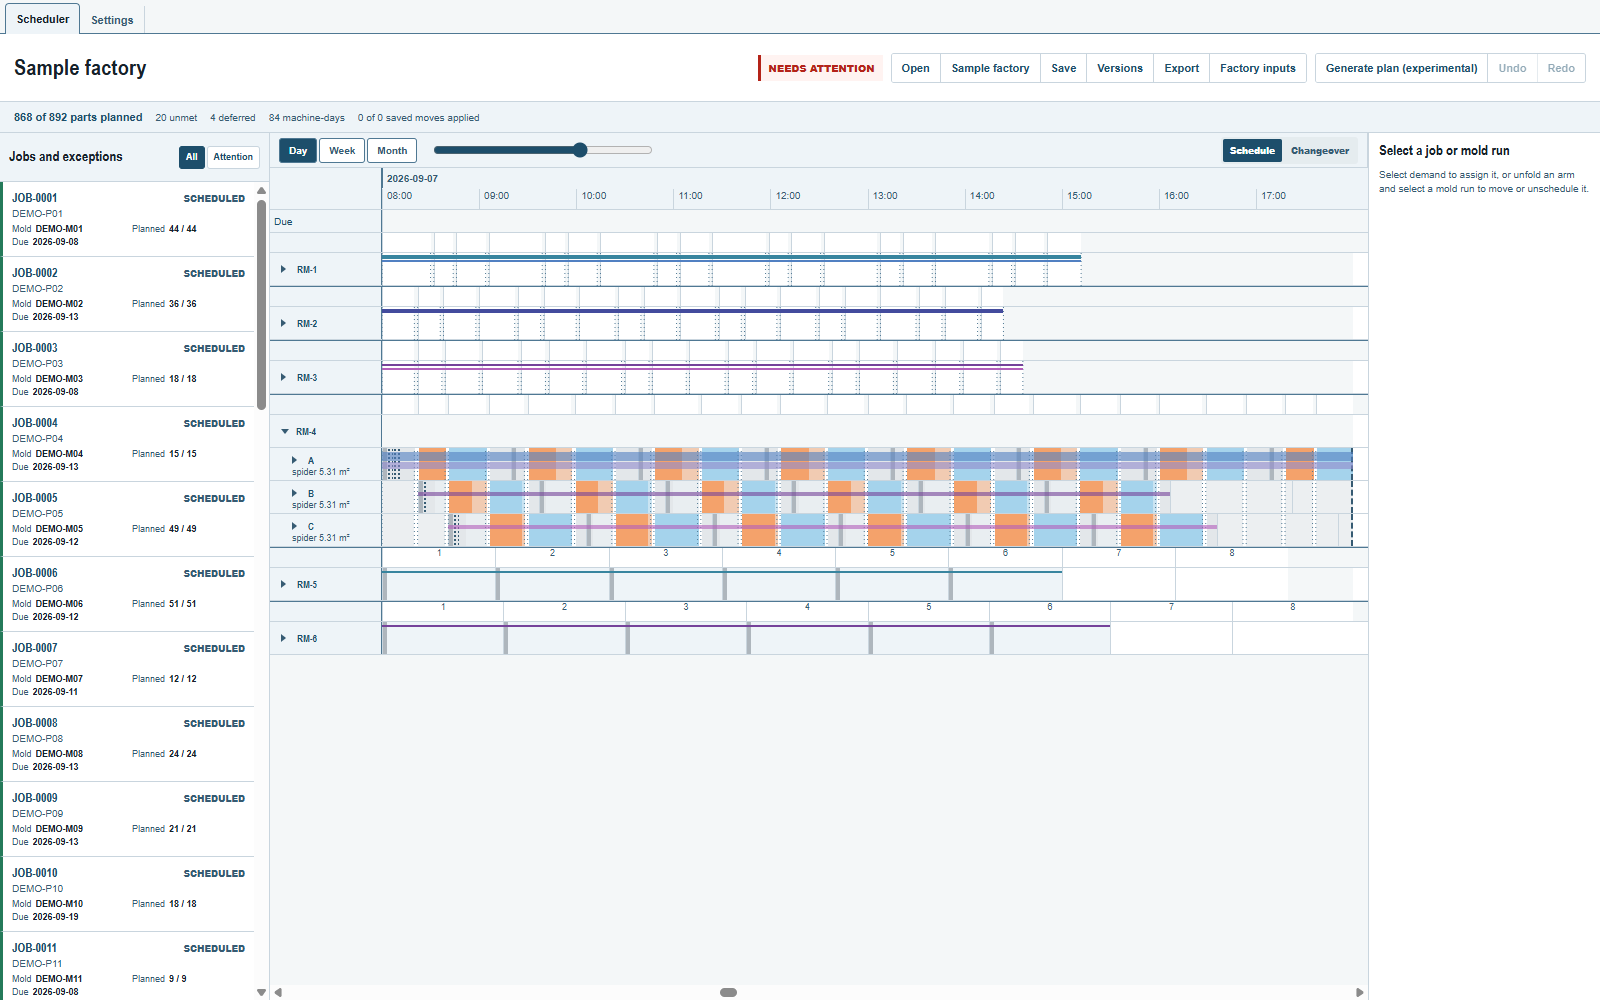
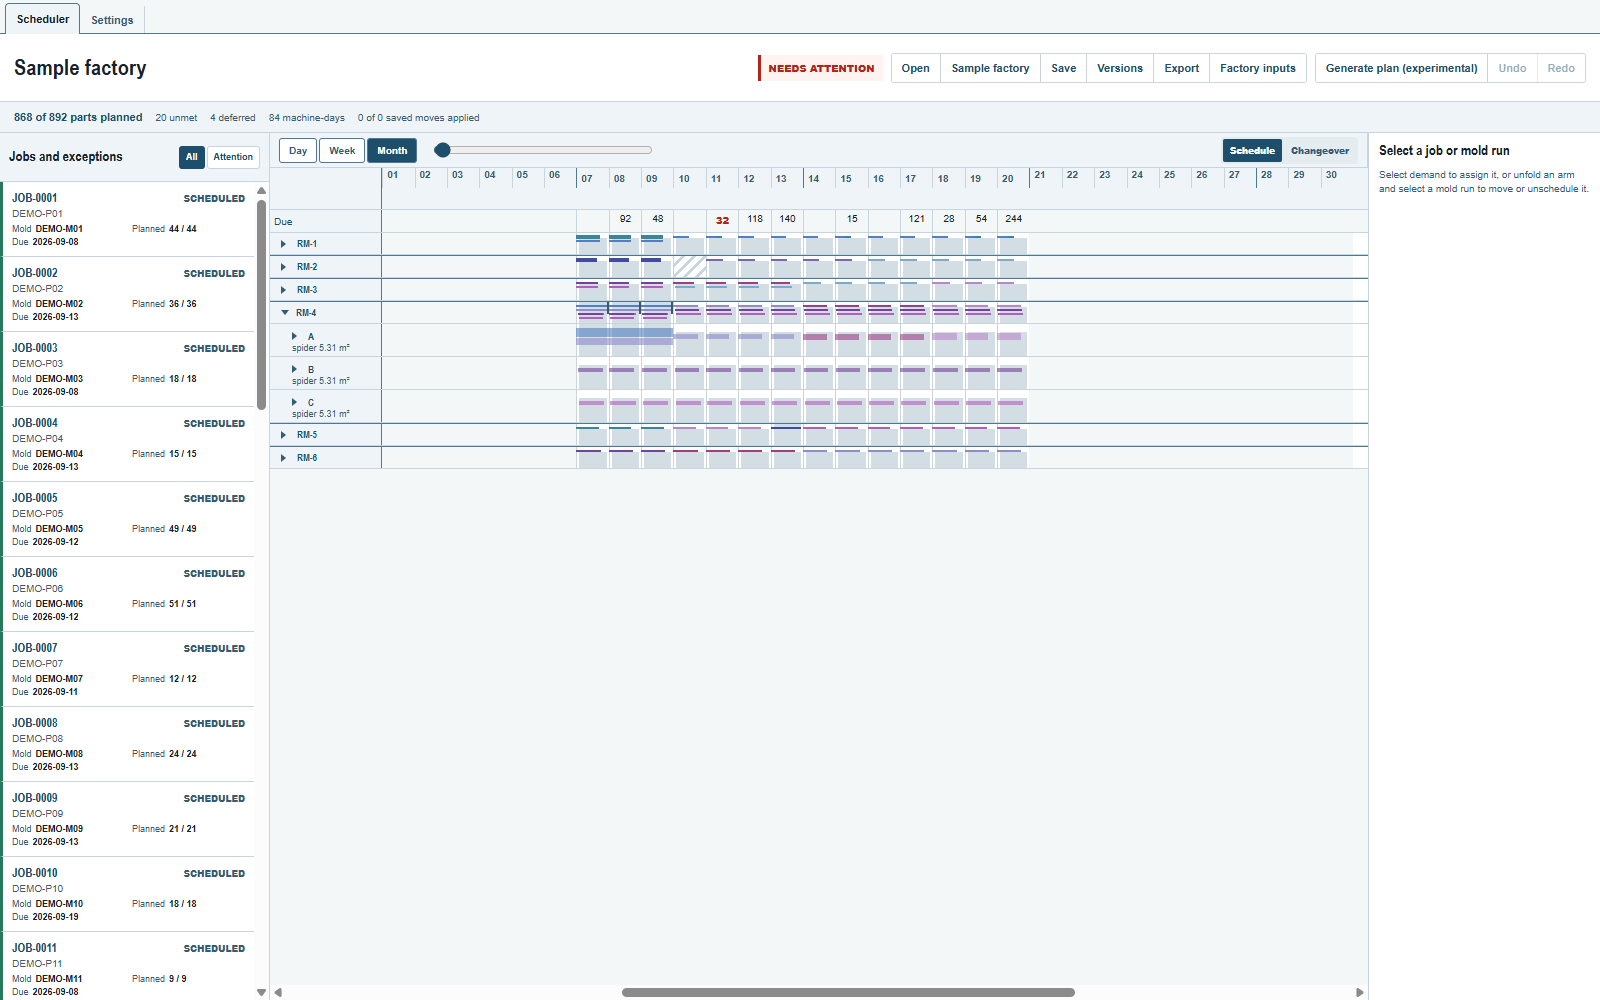
These are three shortcuts on the same board. Zooming changes how much detail you can read; it does not change the plan. To return to a date, double-click its day box, or focus the box and press Enter: the board opens that day and unfolds its machine.
3. Six hours, and the oven order
Return to September 7 in Day, with RM-4 unfolded. Move the slider to the right until the ruler covers about 08:00 to 14:00. At this span none of the three shortcut buttons is highlighted; the ruler's last labelled tick is 13:30. Time, machines, arms and cycles lists every way to zoom and pan.
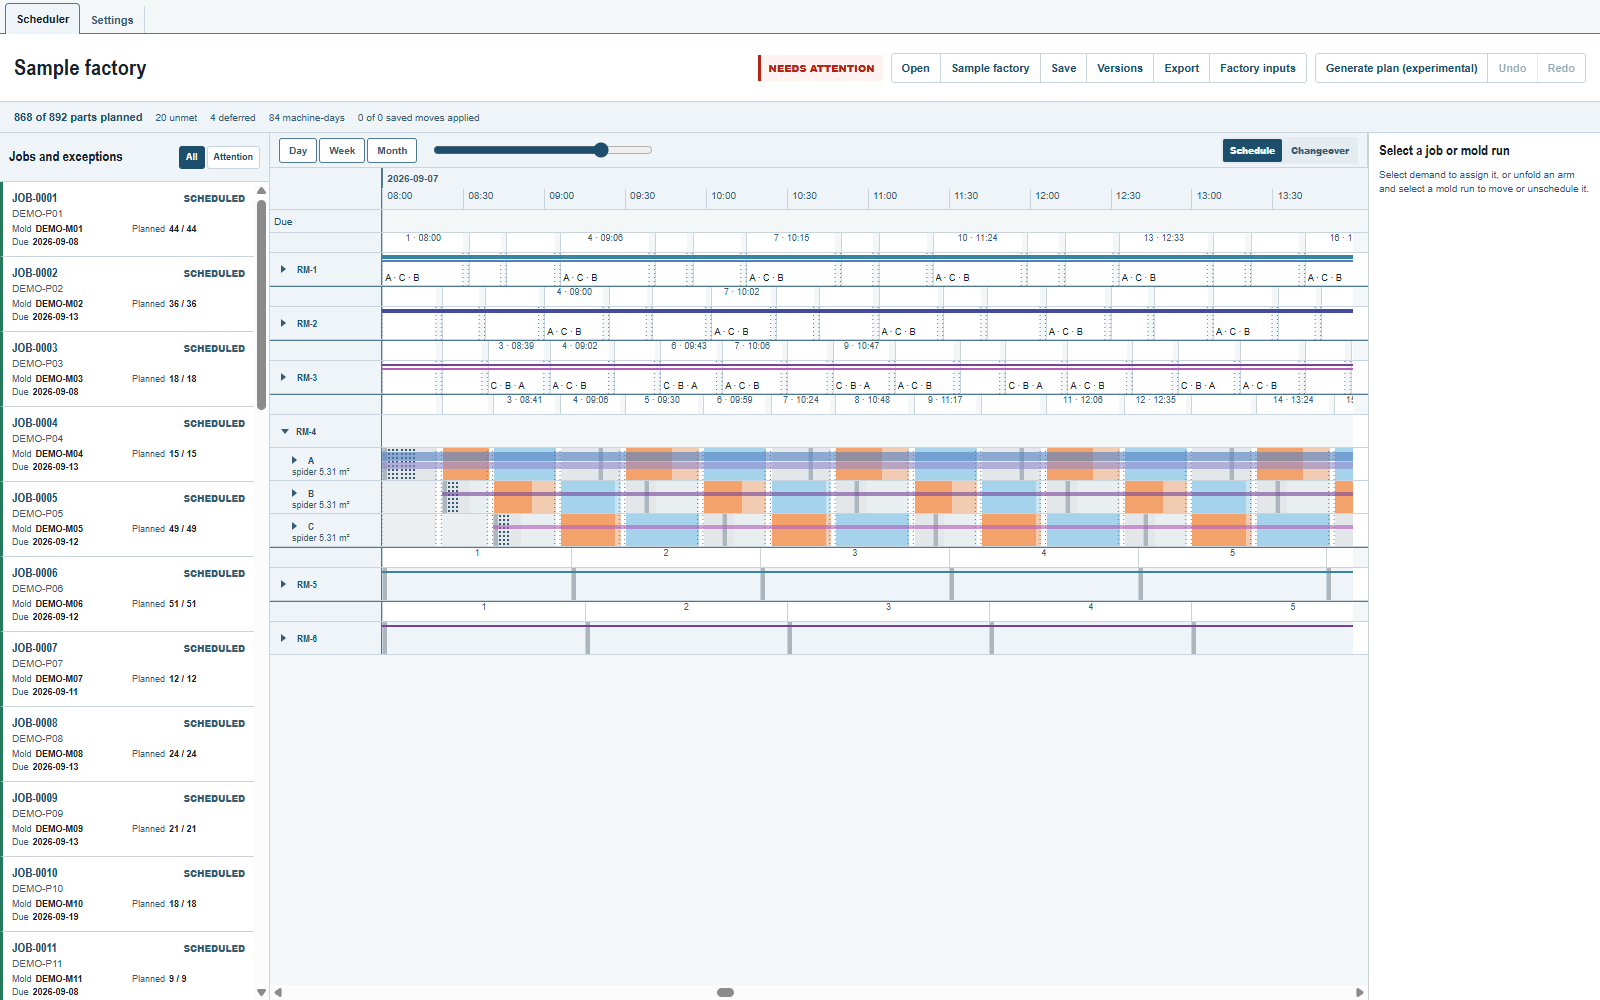
The first heating begins on arm A at 08:22, on B at 08:41 and on C at 09:06. Hover an orange strip to read Heating, its clock times and its duration. Light blue is cooling; grey is work at the service station, dotted where a mold is mounted or removed. The three arms move between stations together but do different work during each stop; a lighter tail is an arm waiting for the others.
4. A mold run
Return to September 7 in Day and unfold RM-2, then its arm A. The arm row grows to the size of its spider, and its mold, DEMO-M03, is a coloured band with the name on it. Hover the band: DEMO-M03 ×2, 6 cycles.
Click the band, without Ctrl, to select a mold run. The inspector names the mold, machine and arm. Check Start cycle and End cycle: a selection can begin with just the cycle you clicked. Set them to 1 and 6 to select all six; the inspector shows 08:00 – 14:24.
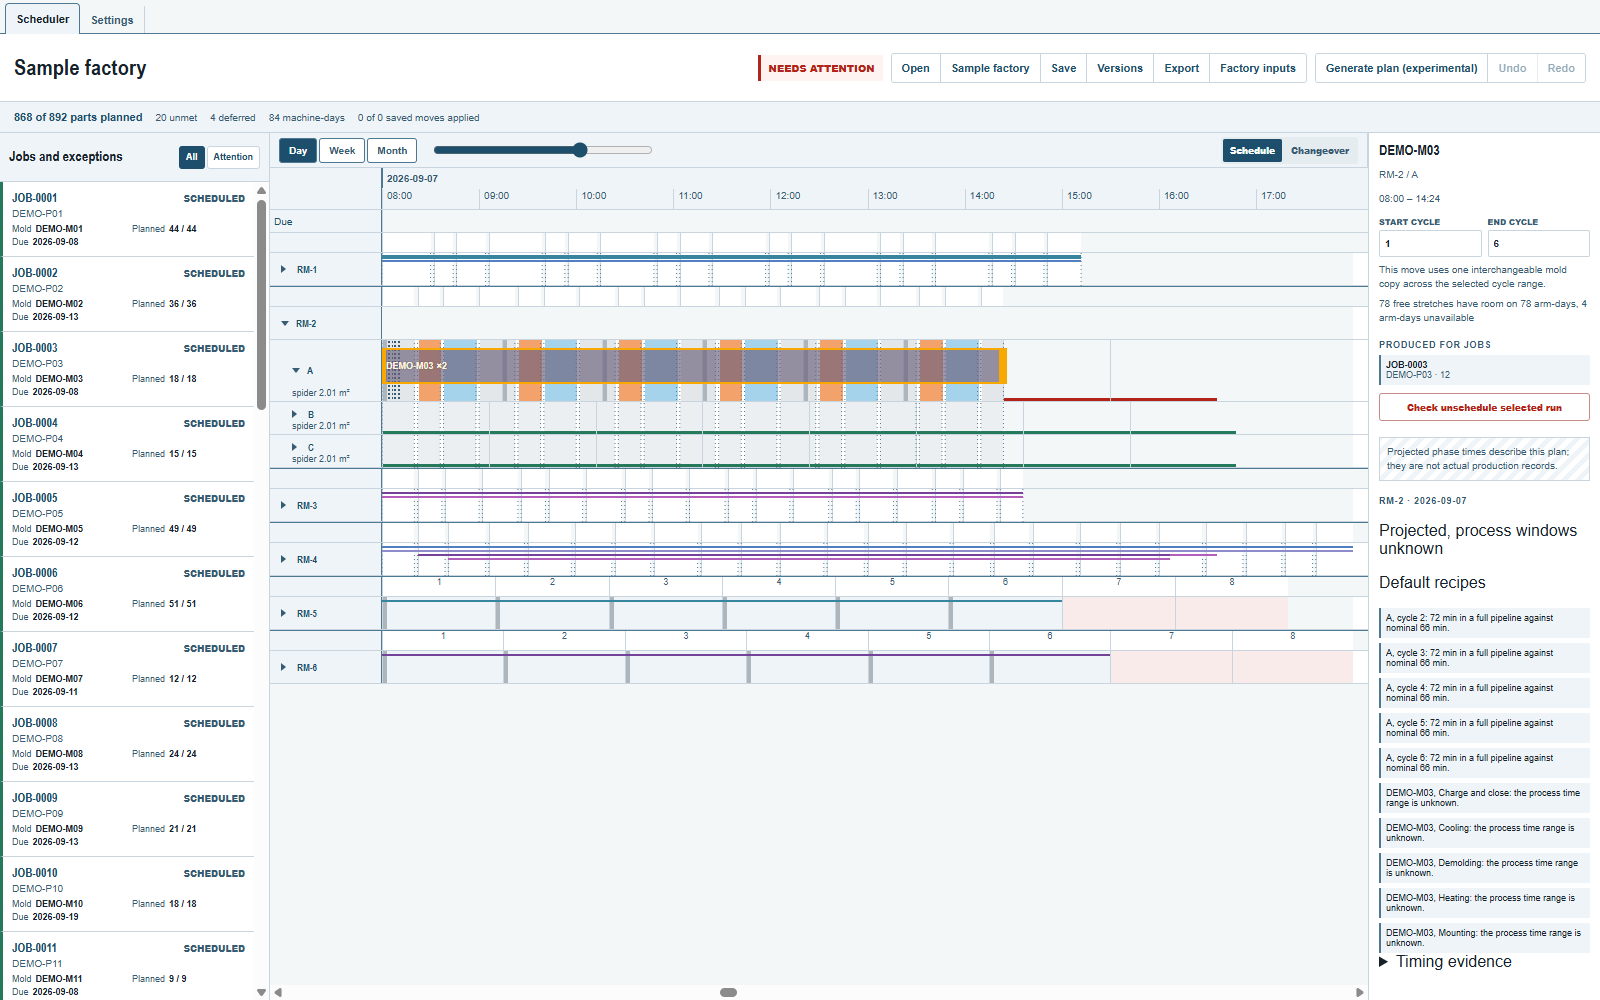
The band's height is the room the mold takes on the spider, and two mounted copies are twice as tall as one; the count ×2 is written after the name. A move uses one mold copy over the selected cycle range. It does not move both copies because the band is tall.
5. One cycle and its timing
Press Esc, unfold RM-4 and return to about six hours on September 7. Hold Ctrl and click the first cycle on arm A.
The inspector shows Capacity scope, with the date, machine, arm, cycle number and time: 08:00 – 09:20 for this cycle. Below it, the day's timing status is Projected, process windows unknown.
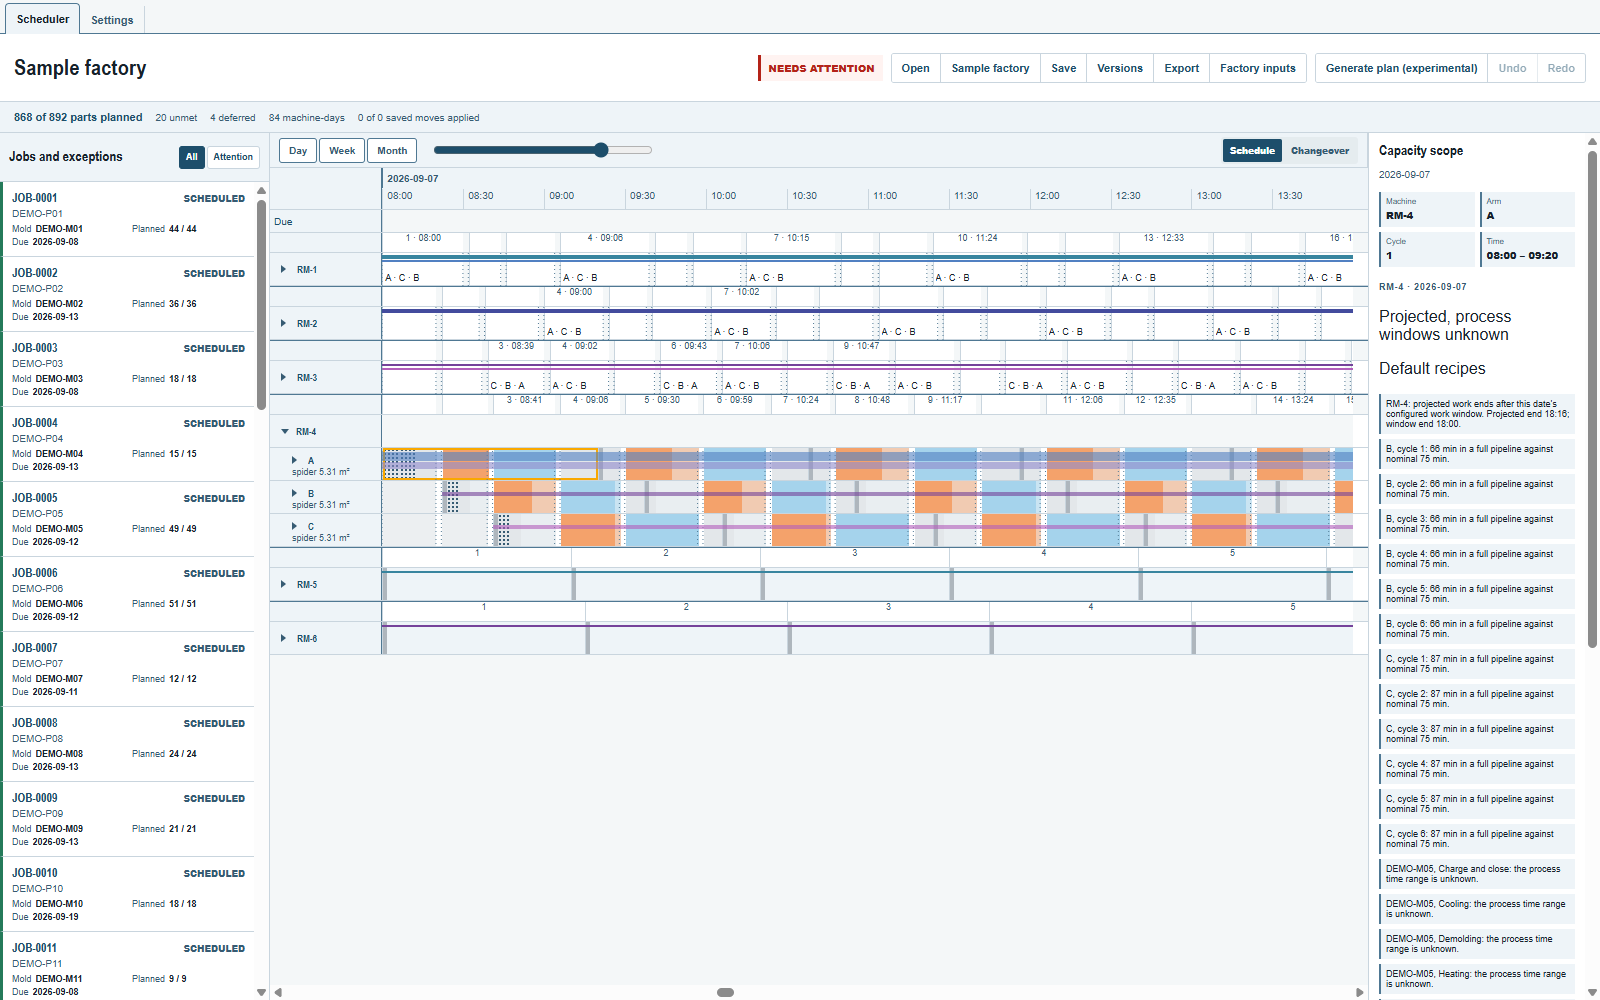
Read the sentences under the status as well as the clock. On this date RM-4's projected work ends at 18:16, after the configured 18:00 close, and the sample has no allowed minimum and maximum process times. A drawn plan is not proof that the day's timing is acceptable; Phases and timing says what each status means.
What to read next
- Move a run, then undo, Keep a named version, Save and reopen a plan and Export a machine-day or a week continue the walk.
- The chapter on reading the board explains what the sample showed.
Comments and questions
The app's rules are our reading of the physics; where your plant knows better, the app changes.